
Darkroom


Firstly, I put INFORD HP5 plus black and white film into the Olympus 10 camera. This takes the maximum amount of 24 images although i worked in a pair and split the film, 12 images each.
When you want to transfer the film on the the spiral, you must cut the tongue of the film and make two more cuts so that it isn't jagged and ready to be fed onto the spiral. In daylight, you can only feed the film so far onto the spiral which is just past the ball point. You must continue the rest in the dark room as the film is extremely sensitive to light, once subjected to the light your film is compactly useless. Once in the dark room, in total darkness we had to feed the rest of the film onto the spiral and cut the canister off the end of the film. This is no easy task as there are more steps that follow up from this in which you have to be in total darkness. After the film is securely on the spiral put the spiral on a tube and then in a Film tank then a funnel must be put in, Once this is done you can put the lid on the Film tank and turn on the lights.
After we excited the dark room (with our film in the Film tank and the lid securely on) we then put on all the equipment; goggles, apron, gloves ready to start using the chemicals.
The chemicals used were; Developer, stop and Fix.
Developer: Converts the latent image to a visible image. ... Paper left in developer will eventually reduce all the silver halides and turn black.
Stop: The stop bath neutralises the developer and stops the film from becoming overexposed.
Fix: The fixer "fixes" the image in place by removing the unexposed silver halides in the film. This stops the film from further reacting to light.
Developer is an alkaline where as fix is an acid.
In order to develop our film we used 150ml of developer that was diluted with 150ml of water, the over all temperature is very important as the temperature affects the quality of the film and potentially damage the images, it must be at 20c (centigrade). We could now open the the film tank and pour the dilution into the funnel. We had to tip it up side down and then right side up every minute 6 minutes apart stopping 30 seconds in between.
When you (non aggressively) shake the film tank the developer activates and starts to produce bubbles.The silver in the film clumps together when reacting to developer and makes a latent image which creates a negative.
After the Developer had been poured away into its own waste container we used 200ml of non diluted stop and repeated the same movement but for 4 minutes straight. Then after the Stop had been pours into its own waste container we repeated the same movement with 300ml of fix for 4 minutes straight after the 4 minutes was up leave for 30 seconds then we poured that away also. Lastly, remove the spiral from the film tank and place on a tube the tube must be submerged in water as the film needs to be cleaned. Leave for 10-15 minutes so that the chemicals are completely cleaned off. Whilst waiting I cleaned my area and equipment. Then take the film out after the 10-15 minutes are up. Once 10-15 minuets have passed, twist the spiral to release the film in order to touch the film I wet my hands and ran two finger down the film to remove any excess water. Once this was done I clipped the ends off then hung the film into the dryer and waited for the film to dry completely.
_edited.jpg)

INFORD HP5 plus black and white film
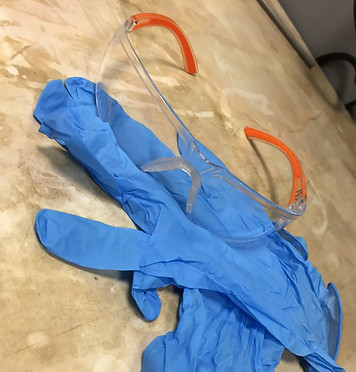
Goggles and Gloves

Thermometer
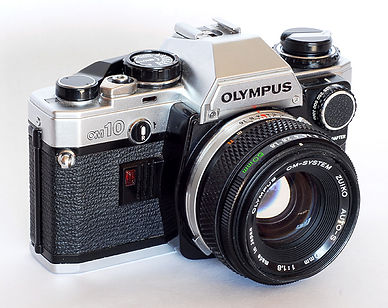
Olympus 10 Camera

Time\ Stop watch

Measuring Tubes
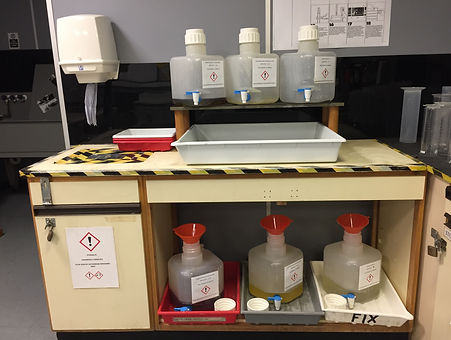
Chemicals Station
Printing
One type of dark room work is printing, in order for a photographer to print they first must complete the steps of film development.
I could cut the film at this point and put it into plastic wallets made especially for film (film holders)
After the development stage and you film has been cleaned and is completed you Can then start using the machine. This machine is called The Enlarger; An enlarger is a special kind of projector used to create your photographic prints. By shining light through the negative, it transfers your image from the small negative and enlarges it onto your paper. It is the most important piece of equipment in the darkroom.
Now that you can have your film in the light you can place whatever image you want to print into the Film Carrier. To remove the carrier you have to lift a small handle, this holds the carrier and your film in place when printing. this is partially difficult as you can not risk scratching the emulsion side, The film carrier should have a small rectangle cut out of it this is where you line your image up. Once the image was lined accurately in the carrier carefully shut the carrier and placed it back into the enlarger
Steps of film development; Refer to the start of the page.
_edited.jpg)